This is my new front door. I decided to get one with a window in it, since we'll be limited on the amount of light we get through the one side of the containers. Ronnie put in the door while Tom and I finished up the roof. It's starting to look a bit more like a house, I think rather than tin cans.
This is a journey into building an underground living space with shipping containers.
Saturday, March 26, 2011
The Roof, part 2...finally finished
It took us a while, but we finally have the roof finished. We still intend to put gutters up but Tom would like to wait a bit and let the earth mounded up around the containers settle before putting those up. We've put insulation across the top of the containers under the roof to help with keeping the cold and heat out since it and the front are the areas most exposed to the elements. We had to contend with high winds and threatened thunderstorms. In order to finish the roof, we had to seal the rears/doors of the containers, so I helped Tom finish the roof while Ronnie worked on the front door so we could still get into the containers and at our equipment. Next we'll be bringing city water onto the property and up to the containers. We've rented a backhoe, which we hope will be able to dig down about 18 inches without us running into large rocks.

 |
| Tom waving hi to everyone. |

Monday, March 7, 2011
Got Power?
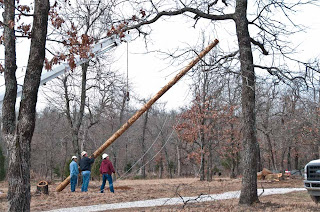
We now have power to the containers. One step closer to living like a sardine. The men from the power company showed up early, caught Tom off guard, he wasn't expecting them for another few weeks. But no matter, things went smoothly, despite the fact that they broke their rock drill bit. All in all it took about 2 hours for them to drill two holes for the poles, string the wires and set the guide wires.
Friday, March 4, 2011
Waterproofing and French Drains
Due to winds of 15 to 20 mph with gusts even higher, Tom has decided to do some waterproofing instead of finishing the roof. We've also had to get ready for the power to be brought down to the containers, so Tom has waterproofed the back side with some foundation waterproofing compound, laid the french drain and began the berm process. Our soil is clay based and very acidic at times, so Tom ordered the product most suited for our area from the local hardware store. If you are thinking about doing a similar project, I suggest going into the building supply or hardware store near you and speaking with them concerning the type of product you will need. There are many different types of products available, some clear spray on types and others are thicker and paint on like tar. We chose a thicker product due to the acidity of the soil and Tom needed two coats before he was satisfied with the results.
Tom applying the first coating.
A French drain (also known as rubble, blind, rock or tile drain) is a trench covered with gravel or rock used to keep ground water away from an area. A pipe perforated on the bottom allows water to seep up into it which will then drain off in another area.
As you can see, we are covering the pipe with a cheese cloth-like product which allows water in and keeps dirt and such out of the pipe preventing clogging. This is an important step if you elect to use a french drain.
 | |
| Waterproofing the containers. |
 |
| Waterproofing. |
Tom applying the first coating.
 |
| French Drain |
A French drain (also known as rubble, blind, rock or tile drain) is a trench covered with gravel or rock used to keep ground water away from an area. A pipe perforated on the bottom allows water to seep up into it which will then drain off in another area.
 |
| French Drain |
As you can see, we are covering the pipe with a cheese cloth-like product which allows water in and keeps dirt and such out of the pipe preventing clogging. This is an important step if you elect to use a french drain.
Subscribe to:
Comments (Atom)


